消息中间件—Rabbitmq
一、介绍
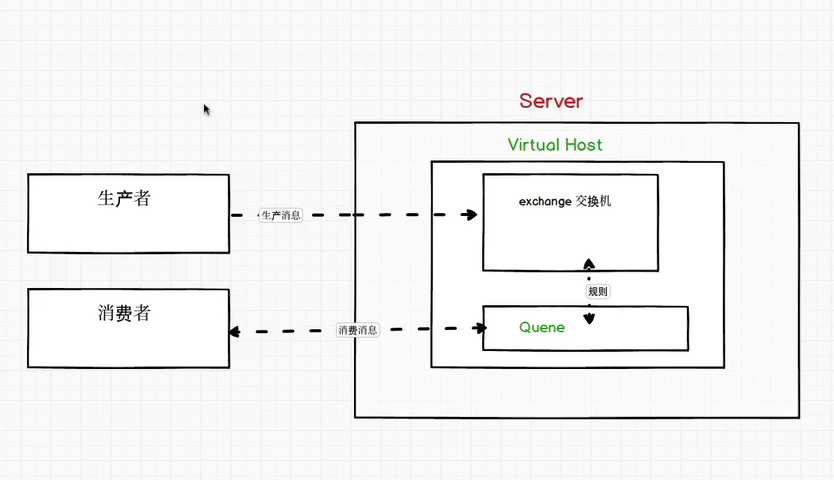
rabbitmq是基于生产者和消费者的一个模型,主要有解耦,异步通信,削峰等作用。
二、下载
官网:RabbitMQ: easy to use, flexible messaging and streaming — RabbitMQ
具体安装rabbitmq可以参考官方文档:下载并安装 RabbitMQ — 兔子MQ
或者可以参考B站视频:https://www.bilibili.com/video/BV1dE411K7MG?p=2
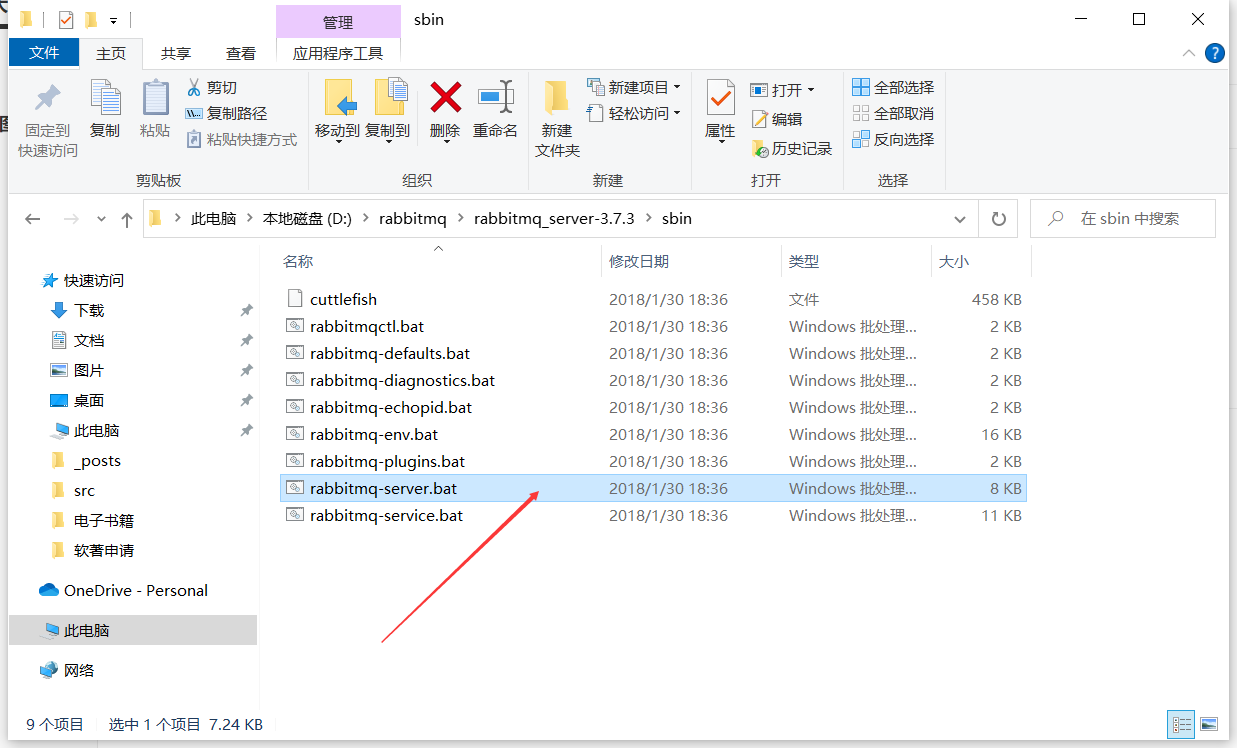
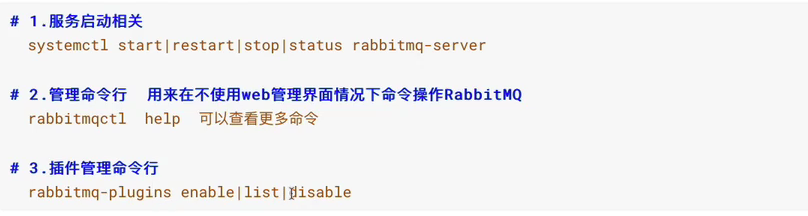
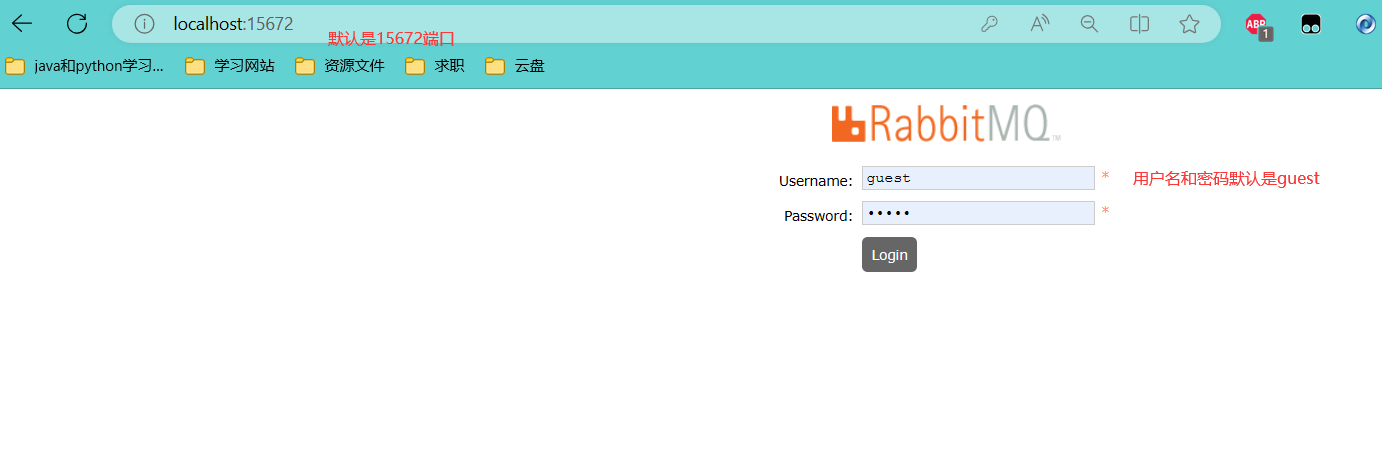
三、rabbitmq的启动和图形界面
Windows:
上传成功界面:

Linux:
图形界面:
四、rabbitmq的简单使用
1、导入依赖
1
2
3
4
5
| ><dependency>
<groupId>com.rabbitmq</groupId>
<artifactId>amqp-client</artifactId>
<version>5.13.1</version>
></dependency>
|
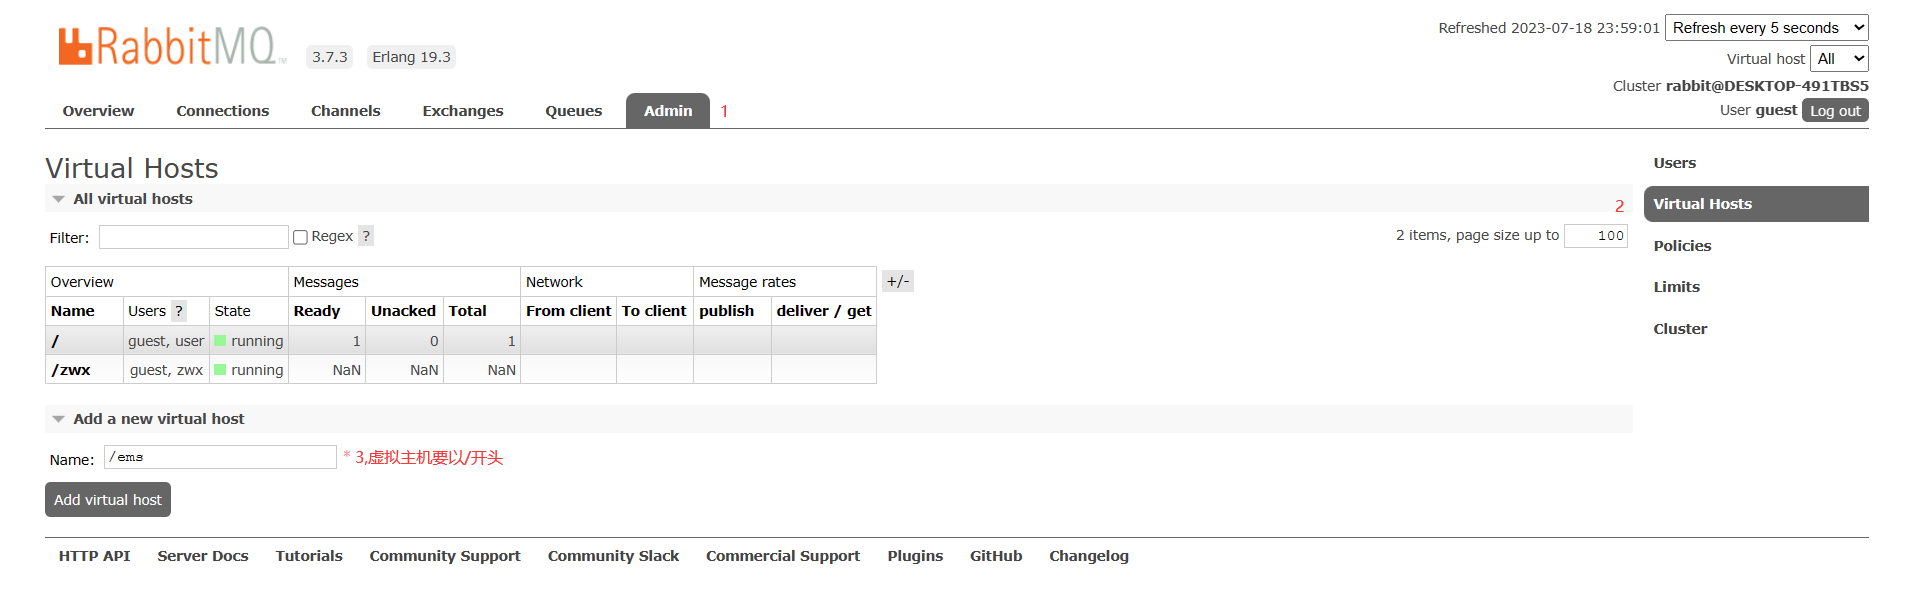
2、构建虚拟主机
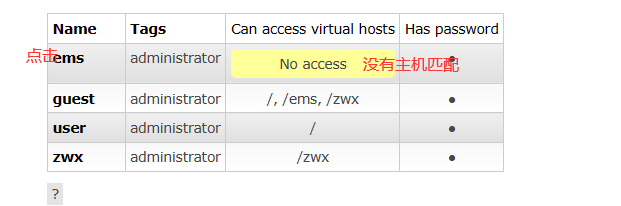
3、创建用户

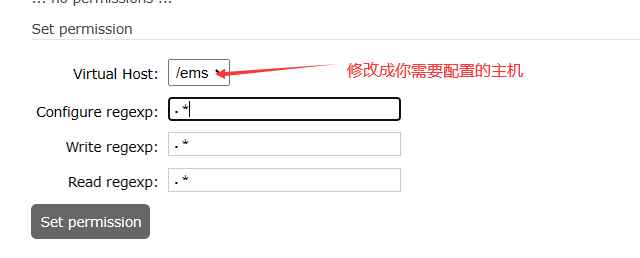
4、用户配置虚拟主机
先点击用户名
5、生产者代码实现
1
2
3
4
5
6
7
8
9
10
11
12
13
14
15
16
17
18
19
20
21
22
23
24
25
26
27
28
29
30
31
| public class helloworldSender {
@Test
public void testSend() throws IOException, TimeoutException {
ConnectionFactory connectionFactory = new ConnectionFactory();
connectionFactory.setHost("localhost");
connectionFactory.setPort(5672);
connectionFactory.setVirtualHost("/ems");
connectionFactory.setUsername("ems");
connectionFactory.setPassword("1234");
Connection connection = connectionFactory.newConnection();
Channel channel = connection.createChannel();
channel.queueDeclare("hello",false,false,false,null);
channel.basicPublish("","hello",null,"hello rabbitmq".getBytes());
channel.close();
connection.close();
}
}
|
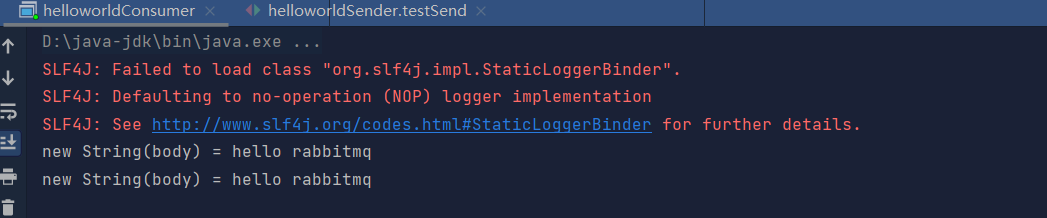
运行截图:

创建消费者,因为消费者要不断监听生产者发的消息,所以使用main函数来监听,(而且在消费者中不要关闭连接)
1
2
3
4
5
6
7
8
9
10
11
12
13
14
15
16
17
18
19
20
21
22
23
24
25
26
27
28
29
30
31
32
33
| public static void main(String[] args) throws IOException, TimeoutException {
ConnectionFactory connectionFactory = new ConnectionFactory();
connectionFactory.setHost("127.0.0.1");
connectionFactory.setPort(5672);
connectionFactory.setVirtualHost("/ems");
connectionFactory.setUsername("ems");
connectionFactory.setPassword("1234");
Connection connection = connectionFactory.newConnection();
Channel channel = connection.createChannel();
channel.queueDeclare("hello",false,false,false,null);
channel.basicConsume("hello",true,new DefaultConsumer(channel){
@Override
public void handleDelivery(String consumerTag, Envelope envelope, AMQP.BasicProperties properties, byte[] body) throws IOException {
System.out.println("new String(body) = "+ new String(body));
}
});
}
|
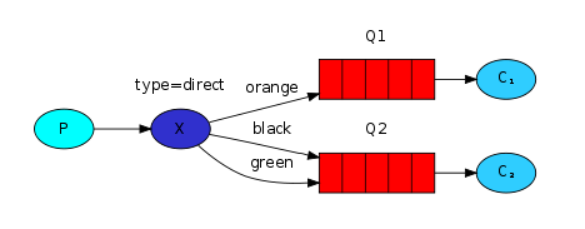
6、direct模型图(direct)
五、封装rabbitmq中连接工具类封装
工具类代码:
1
2
3
4
5
6
7
8
9
10
11
12
13
14
15
16
17
18
19
20
21
22
23
24
25
26
27
28
29
30
31
32
33
34
35
36
| public class RabbitMQUtils {
private static ConnectionFactory connectionFactory;
static {
connectionFactory = new ConnectionFactory();
connectionFactory.setVirtualHost("/ems");
connectionFactory.setPort(5672);
connectionFactory.setHost("localhost");
connectionFactory.setUsername("ems");
connectionFactory.setPassword("1234");
}
public static Connection getConnection(){
try{
return connectionFactory.newConnection();
}catch (Exception e){
e.printStackTrace();
}
return null;
}
public static void closeConnectionAndChannel(Channel channel,Connection connection){
try{
if(channel!=null){
channel.close();
}
if(connection!=null){
connection.close();
}
}catch (Exception e){
e.printStackTrace();
}
}
}
|
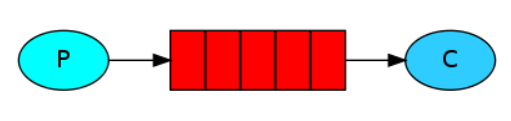
六、Work Queues
1、模型

生产者:
1
2
3
4
5
6
7
8
9
10
11
12
13
| public class provider {
public static void main(String[] args) throws IOException {
Connection connection = RabbitMQUtils.getConnection();
Channel channel = connection.createChannel();
channel.queueDeclare("work",true,false,false,null);
for(int i = 0;i<10;i++) {
channel.basicPublish("","work",null,(i + "hello work queue").getBytes());
}
RabbitMQUtils.closeConnectionAndChannel(channel,connection);
}
}
|
消费者一:
1
2
3
4
5
6
7
8
9
10
11
12
13
14
15
| public class Consumer1 {
public static void main(String[] args) throws IOException {
Connection connection = RabbitMQUtils.getConnection();
Channel channel = connection.createChannel();
channel.queueDeclare("work",true,false,false,null);
channel.basicConsume("work",true,new DefaultConsumer(channel){
@Override
public void handleDelivery(String consumerTag, Envelope envelope, AMQP.BasicProperties properties, byte[] body) throws IOException {
System.out.println("消费者-1: "+ new String(body));
}
});
}
}
|
消费者二:
1
2
3
4
5
6
7
8
9
10
11
12
13
14
15
| public class Consumer2 {
public static void main(String[] args) throws IOException {
Connection connection = RabbitMQUtils.getConnection();
Channel channel = connection.createChannel();
channel.queueDeclare("work",true,false,false,null);
channel.basicConsume("work",true,new DefaultConsumer(channel){
@Override
public void handleDelivery(String consumerTag, Envelope envelope, AMQP.BasicProperties properties, byte[] body) throws IOException {
System.out.println("消费者-2: "+ new String(body));
}
});
}
}
|
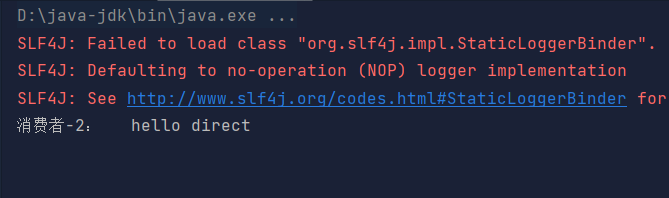
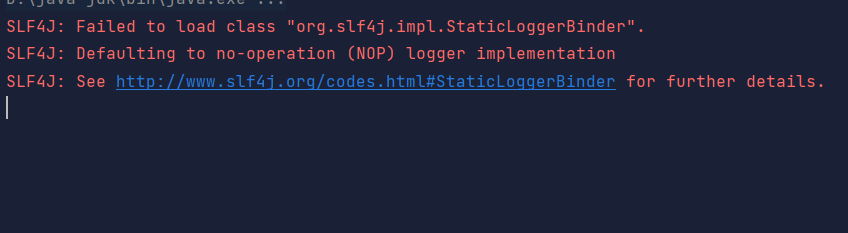
运行截图:
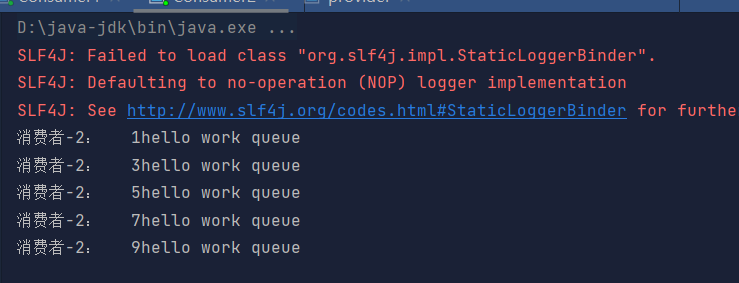
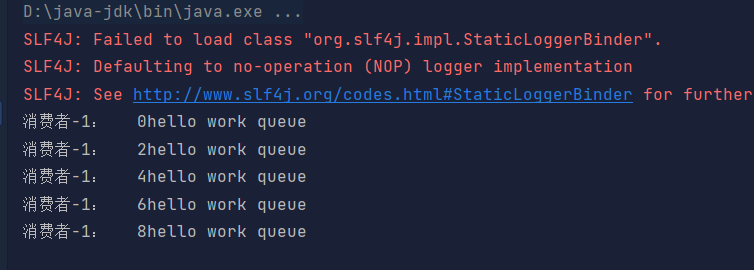
结论:平均分配
公平调度
您可能已经注意到调度仍然无法正常工作 如我们所愿。例如,在有两个工人的情况下,当所有 奇数消息很重,偶数消息很轻,一个工作人员将是 经常忙碌,另一个几乎不会做任何工作。井 RabbitMQ对此一无所知,仍然会调度 消息均匀。
发生这种情况是因为 RabbitMQ 只是在消息时调度消息 进入队列。它不看未确认的数量 面向消费者的消息。它只是盲目地发送每 n 条消息 给第 n 个消费者。

为了解决这个问题,我们可以将 basicQos 方法与预取计数 = 1 设置一起使用。这告诉 RabbitMQ 不要付出更多 一次给工作人员一条消息。或者,换句话说,不要调度 给工作人员的新消息,直到它处理并确认 前一个。相反,它会将其调度给下一个尚未繁忙的工作人员。
1
2
3
4
5
| int prefetchCount = 1;
channel.basicQos(prefetchCount);
channel.basicConsume("work",false,new DefaultConsumer(channel){})
channel.basicAck(delivery.getEnvelope().getDeliveryTag(), false);
|
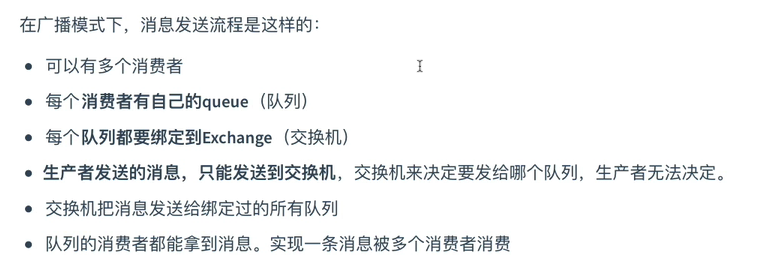
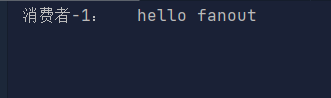
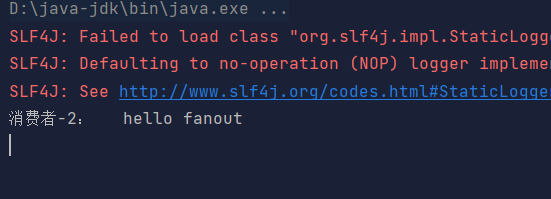
七、Fanout(发布订阅)Publish/Subscribe
1、模型图:
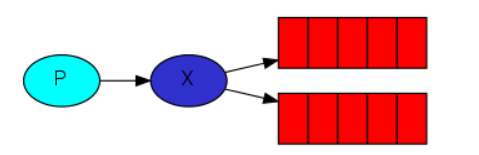
2、开发生产者:
1
2
3
4
5
6
7
8
9
10
| public class Provider {
public static void main(String[] args) throws IOException {
Connection connection = RabbitMQUtils.getConnection();
Channel channel = connection.createChannel();
channel.exchangeDeclare("logs","fanout");
channel.basicPublish("logs","",null, "hello fanout".getBytes());
RabbitMQUtils.closeConnectionAndChannel(channel,connection);
}
}
|
3、消费者:
消费者-1
1
2
3
4
5
6
7
8
9
10
11
12
13
14
15
16
17
18
| public class Consumer1 {
public static void main(String[] args) throws IOException {
Connection connection = RabbitMQUtils.getConnection();
Channel channel = connection.createChannel();
channel.exchangeDeclare("logs","fanout");
String queueName = channel.queueDeclare().getQueue();
channel.queueBind(queueName,"logs","");
channel.basicConsume(queueName,true,new DefaultConsumer(channel){
@Override
public void handleDelivery(String consumerTag, Envelope envelope, AMQP.BasicProperties properties, byte[] body) throws IOException {
System.out.println("消费者-1: "+ new String(body));
}
});
}
}
|
消费者-2:
消费者-3:
消费者2和消费者3代码一样
运行截图:
八、Routing
1、模型图:
2、开发生产者:
1
2
3
4
5
6
7
8
9
10
11
12
13
14
15
16
17
18
| public class Consumer1 {
public static void main(String[] args) throws IOException {
Connection connection = RabbitMQUtils.getConnection();
Channel channel = connection.createChannel();
channel.exchangeDeclare("logs_direct","direct");
String queueName = channel.queueDeclare().getQueue();
channel.queueBind(queueName,"logs_direct","error");
channel.basicConsume(queueName,true,new DefaultConsumer(channel){
@Override
public void handleDelivery(String consumerTag, Envelope envelope, AMQP.BasicProperties properties, byte[] body) throws IOException {
System.out.println("消费者-1: "+ new String(body));
}
});
}
}
|
消费者-2:
1
2
3
4
5
6
7
8
9
10
11
12
13
14
15
16
17
18
19
20
21
| public class Consumer2 {
public static void main(String[] args) throws IOException {
Connection connection = RabbitMQUtils.getConnection();
Channel channel = connection.createChannel();
channel.exchangeDeclare("logs_direct","direct");
String queueName = channel.queueDeclare().getQueue();
channel.queueBind(queueName,"logs_direct","info");
channel.queueBind(queueName,"logs_direct","error");
channel.basicConsume(queueName,true,new DefaultConsumer(channel){
@Override
public void handleDelivery(String consumerTag, Envelope envelope, AMQP.BasicProperties properties, byte[] body) throws IOException {
System.out.println("消费者-2: "+ new String(body));
}
});
}
}
|
消费者-3:
运行截图:
九、Topic
1、模型图:
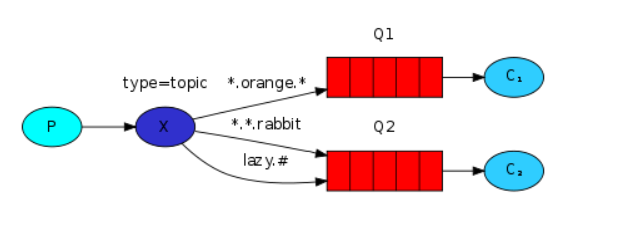
- *(星号)可以代替一个词。
- #(哈希)可以替换零个或多个单词。
在这个例子中,我们将发送所有描述的消息 动物。消息将使用路由密钥发送,该路由密钥包含 三个字(两个点)。路由密钥中的第一个单词 将描述一个名人,第二个是颜色,第三个是物种: “..”。
我们创建了三个绑定:Q1 绑定绑定键“.orange.”。 Q2 带有“..rabbit”和“lazy.#”。
2、开发生产者:
1
2
3
4
5
6
7
8
9
10
11
| public class Provider {
public static void main(String[] args) throws IOException {
Connection connection = RabbitMQUtils.getConnection();
Channel channel = connection.createChannel();
channel.exchangeDeclare("topics","topic");
String routingKry = "user.save";
channel.basicPublish("topics",routingKry,null, ("hello topic ["+routingKry+"]").getBytes());
RabbitMQUtils.closeConnectionAndChannel(channel,connection);
}
}
|
消费者-2:
1
2
3
4
5
6
7
8
9
10
11
12
13
14
15
16
17
18
19
| public class Consumer2 {
public static void main(String[] args) throws IOException {
Connection connection = RabbitMQUtils.getConnection();
Channel channel = connection.createChannel();
channel.exchangeDeclare("topics","topic");
String queueName = channel.queueDeclare().getQueue();
channel.queueBind(queueName,"topics","user.#");
channel.basicConsume(queueName,true,new DefaultConsumer(channel){
@Override
public void handleDelivery(String consumerTag, Envelope envelope, AMQP.BasicProperties properties, byte[] body) throws IOException {
System.out.println("消费者-1: "+ new String(body));
}
});
}
}
|
消费者-3:
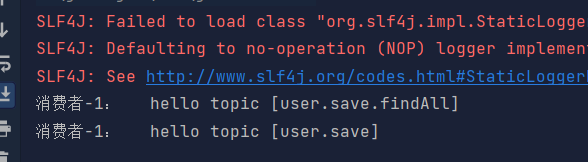
运行截图:

十、RPC框架
RabbitMQ tutorial - Remote procedure call (RPC) — RabbitMQ官网自己学习
结束了!!!
rabbitmq的基础学习已完成!!!!